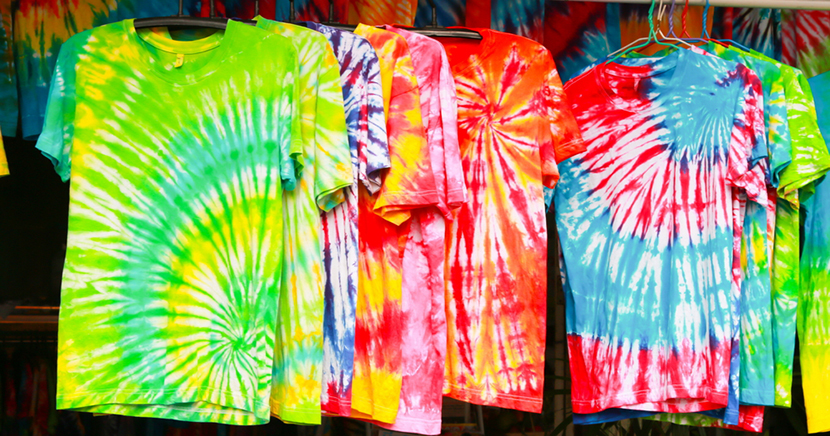
Tie-dyeing shirts is a fun and creative way to add vibrant colors and unique patterns to your wardrobe. Whether you’re aiming for a classic hippie tie-dye shirt or an elegant blue tie-dye shirt, the process can be applied to various fabrics to achieve different effects. In this article, we’ll walk you through the steps of tie-dyeing shirts on different fabrics and share some tips to help you perfect the art of tie-dye.
Understanding Fabric Choices for Tie-Dye
Before you dive into tie-dyeing, it’s crucial to understand that not all fabrics will react to dye in the same way. Natural fibers like cotton, linen, and silk absorb dye well and usually yield the best results. Synthetic fibers such as polyester or nylon may not take dye as readily, resulting in less vibrant colors.
Natural Fibers: Cotton, Linen, and Silk
Cotton is the most commonly used fabric for tie-dye because it’s affordable and readily absorbs dye. Linen, while similar to cotton, has a different weave and may result in a slightly different look. Silk is a luxurious option that can create stunning tie-dye effects but requires a gentle touch and may need a specific type of dye.
Synthetic Fibers: Polyester and Nylon
If you’re working with synthetic fibers like polyester or nylon, you’ll need to use a dye specifically formulated for synthetics. Keep in mind that the results may be more subdued than what you can achieve with natural fibers.
Preparing Your Shirt for Tie-Dye
Before starting the tie-dye process, it’s essential to prepare your shirt to ensure the dye sets properly.
Washing Your Shirt
Always begin by washing your shirt to remove any oils, dirt, or sizing that could prevent the dye from adhering evenly. You don’t need to dry the shirt after washing; tie-dyeing works best on damp fabric.
Selecting Your Dye
Choose a dye that is appropriate for your fabric type. Fiber-reactive dyes are excellent for natural fibers, while acid dyes work well on silk, and disperse dyes are designed for synthetics.
Tie-Dye Techniques for Different Patterns
The pattern you want to achieve will dictate how you fold, twist, or tie your shirt. Here are some popular techniques:
Spiral Pattern
Lay your shirt flat, then pinch the center or any point on the fabric and twist it into a spiral shape. Secure the spiral with rubber bands to create wedge-like sections to apply different colors.
Bullseye Pattern
Grab the middle of the shirt and lift it upwards. Secure it with a rubber band, then add more rubber bands at intervals down the length of the fabric to create concentric circles.
Stripes and Folds
Fold your shirt accordion-style for vertical stripes or diagonally for angled stripes. Secure the folds with rubber bands before dyeing.
Dyeing Your Shirt
Once your shirt is prepared and tied, it’s time to apply the dye.
Preparing the Dye
Mix your dye according to the instructions, ensuring it’s fully dissolved. You may want to use squeeze bottles for easy application.
Applying the Dye
Apply the dye to the sections of the shirt created by the rubber bands. For more control over the color placement, use squeeze bottles. Remember to dye both sides of the shirt.
Setting the Dye
After applying the dye, place the shirt in a plastic bag to keep it damp and let it sit for at least 6-8 hours or overnight. This allows the dye to set and ensures vibrant colors.
Rinsing and Washing Post-Dye
Once the dye has set, it’s time to rinse and wash your shirt.
Rinsing the Shirt
Carefully cut off the rubber bands and rinse the shirt under cold water to remove excess dye. Gradually warm the water until it runs clear.
Washing and Drying
Wash the shirt separately in hot water with a little detergent. Dry it in the dryer or hang it up to air dry.
Tips for Tie-Dye Success
Here are some additional tips to help you achieve the best results:
- Pre-soak your shirt in a solution of soda ash and water if using fiber-reactive dyes, as it helps the dye bond with the fabric.
- Wear gloves to protect your hands from staining and use old towels or plastic sheets to cover your workspace.
- For more intense colors, apply the dye generously and let the shirt sit longer before rinsing.
- Experiment with different tying methods and color combinations to create your own unique designs.
Special Considerations for Different Fabrics
Cotton
Cotton is forgiving and easy to work with. It’s perfect for beginners and allows for bright, long-lasting colors.
Linen
Linen may require a higher concentration of dye or a longer setting time due to its thicker fibers.
Silk
Silk should be handled delicately and may require a specific silk dye and a shorter setting time to preserve the fabric’s softness.
Polyester and Nylon
Synthetic fabrics require high-heat dyeing methods and may not produce as vibrant colors. Follow the dye manufacturer’s instructions carefully.
Maintaining Your Tie-Dye Shirts
To keep your tie-dye shirts looking great, wash them in cold water and with similar colors. Avoid bleach and harsh detergents, as they can fade the dye. Over time, the colors may soften, which can add to the shirt’s vintage appeal.
Conclusion
Tie-dyeing shirts is a rewarding craft that lets you express your creativity and personalize your clothing. By understanding how different fabrics react to dye and mastering various tie-dye techniques, you can create beautiful, one-of-a-kind pieces that stand out. Remember to experiment, have fun, and don’t be afraid to try new patterns and color combinations.
Whether you’re making a statement with hippie tie-dye shirts or keeping it cool with blue tie-dye shirts, the possibilities are endless. So grab your dyes, twist up some shirts, and get ready to brighten your wardrobe with vibrant tie-dye creations!


